I wanted to test Portainer.io as a Control Pane for Docker Swarm, but in order to do this I first need some infrastructure running in the cloud, and for this article I will focus on getting Docker Community Edition (CE) to run on Azure.
Goal: Setup Docker CE as a Docker Swarm on Azure
I will be following this guide to setup Docker CE on Azure:
https://docs.docker.com/docker-for-azure/
and this guide specifies that I need some prerequisites:
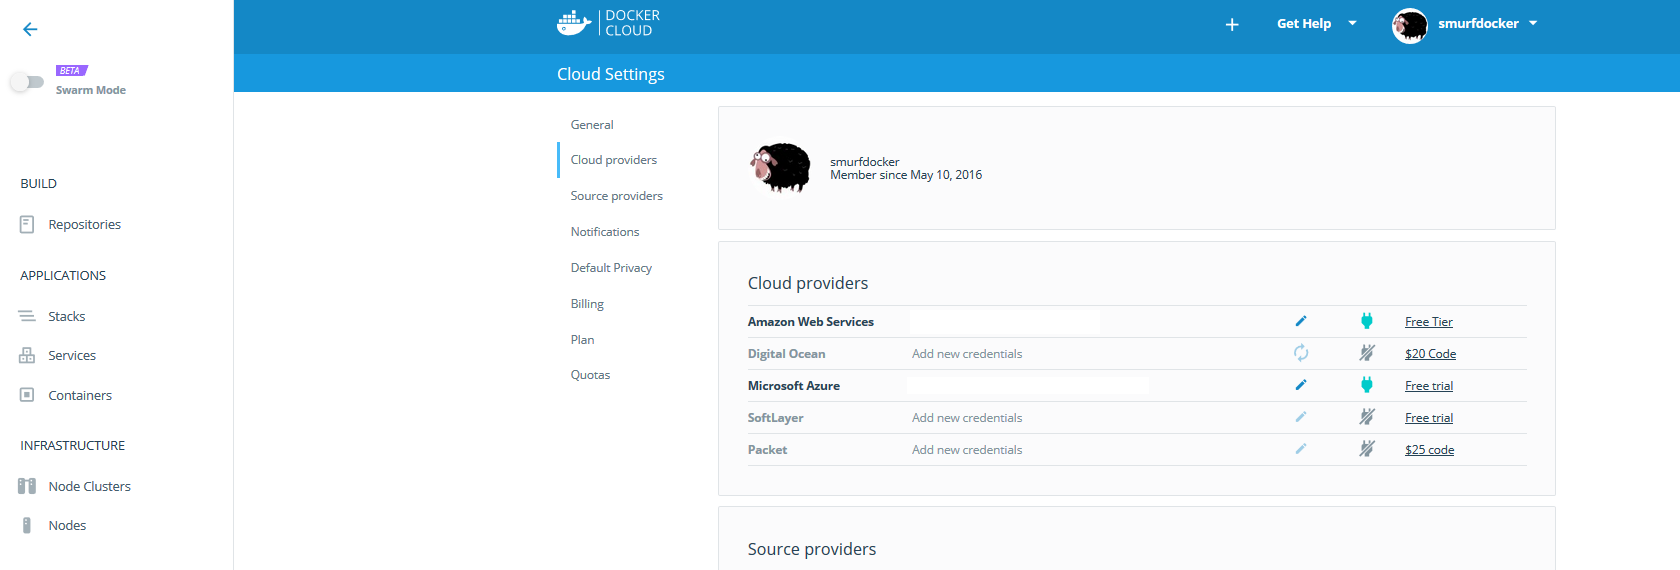
Access to an Azure account with admin privileges
Yep, got that. If not then create for free => https://azure.microsoft.com/en-us/free/
SSH key that you want to use when accessing your completed Docker install on Azure
To avoid bloating my own developer laptop, I create my own workspace in a Container and work from there and keep the files on Bitbucket. That way I can move my workspace around on different computers without caring about snowflakes. The workspace setup used is shared here: https://bitbucket.org/geircode/setting_up_docker_community_edition_template
So if you do not have “ssh-keygen” installed then it is easy to start a linux Container and execute something like:
ssh-keygen -t rsa -b 4096 -C geircode@geircode.no -f /app/ubuntu/geircode_19f93204_rsa
Or click on the “Dockerfile.build.bat” and then “docker-compose.up.bat”. This will start a container and open up an interactive terminal. A shared volume is set up between Docker Host and the Container so that the files you see inside the Container on /app are the same files you are seeing on the Docker Host. Running the above command will create the certificate inside the /ubuntu folder which is also accessible on the Docker Host because of the shared volume.
Creating a “Service principal”
Execute something like:
docker run -ti docker4x/create-sp-azure docker_ce_19f93204 docker-ce-19f93204_rg westeurope
If the script fails for some reason, then navigate to Azure Portal to delete the Service Principal that gets created before running the script again.
https://portal.azure.com/#blade/Microsoft_AAD_IAM/ActiveDirectoryMenuBlade/RegisteredApps
root@40198a525e8f:/app# docker run -ti docker4x/create-sp-azure docker_ce_19f93204 docker-ce-19f93204_rg westeurope

info: Executing command login

/info: To sign in, use a web browser to open the page https://microsoft.com/devicelogin and enter the code XXXXXXXXX to authenticate.

info: Added subscription Visual Studio Premium med MSDN

info: Setting subscription "Visual Studio Premium" as default

+

info: login command OK

Using subscription xxxxxxxxx-xxxx-xxxx-xxxx-xxxxxxxxxxxx

info: Executing command account set

info: Setting subscription to "Visual Studio Premium" with id "xxx".

info: Changes saved

info: account set command OK

Creating AD application docker_ce_19f93204

Created AD application, APP_ID= xxxxxxxxx-xxxx-xxxx-xxxx-xxxxxxxxxxxx

Creating AD App ServicePrincipal

Created ServicePrincipal ID= xxxxxxxxx-xxxx-xxxx-xxxx-xxxxxxxxxxxx

Create new Azure Resource Group docker-ce-19f93204_rg in westeurope

info: Executing command group create

+ Getting resource group docker-ce-19f93204_rg

+ Creating resource group docker-ce-19f93204_rg

info: Created resource group docker-ce-19f93204_rg

data: Id: /subscriptions/ xxxxxxxxx-xxxx-xxxx-xxxx-xxxxxxxxxxxx /resourceGroups/docker-ce-19f93204_rg

data: Name: docker-ce-19f93204_rg

data: Location: westeurope

data: Provisioning State: Succeeded

data: Tags: null

data:

info: group create command OK

Resource Group docker-ce-19f93204_rg created

Waiting for account updates to complete before proceeding ...

Creating role assignment for xxxxxxxxx-xxxx-xxxx-xxxx-xxxxxxxxxxxx scoped to docker-ce-19f93204_rg

info: Executing command role assignment create

+ Finding role with specified name

/data: RoleAssignmentId : /subscriptions/ xxxxxxxxx-xxxx-xxxx-xxxx-xxxxxxxxxxxx /resourcegroups/docker-ce-19f93204_rg/providers/Microsoft.Authorization/roleAssignments/ xxxxxxxxx-xxxx-xxxx-xxxx-xxxxxxxxxxxx

data: RoleDefinitionName : Contributor

data: RoleDefinitionId : xxxxxxxxx-xxxx-xxxx-xxxx-xxxxxxxxxxxx

data: Scope : /subscriptions/ xxxxxxxxx-xxxx-xxxx-xxxx-xxxxxxxxxxxx/resourcegroups/docker-ce-19f93204_rg

data: Display Name : docker_ce_19f93204

data: SignInName : undefined

data: ObjectId : xxxxxxxxx-xxxx-xxxx-xxxx-xxxxxxxxxxxx

data: ObjectType : ServicePrincipal

data:

+

info: role assignment create command OK

Successfully created role assignment for xxxxxxxxx-xxxx-xxxx-xxxx-xxxxxxxxxxxx

Test login...

Waiting for roles to take effect ...

info: Executing command login

-info: Added subscription Visual Studio Enterprise

+

info: login command OK


Your access credentials ==================================================

AD ServicePrincipal App ID: xxxxxxxxx-xxxx-xxxx-xxxx-xxxxxxxxxxxx

AD ServicePrincipal App Secret: xxxxxxxxxxxxxxxxxxxxxxxxxxxxxxxxxxxx

AD ServicePrincipal Tenant ID: xxxxxxxxx-xxxx-xxxx-xxxx-xxxxxxxxxxxx

Resource Group Name: docker-ce-19f93204_rg

Resource Group Location: westeurope

root@40198a525e8f:/app#
Great success.. What now? Go to: https://docs.docker.com/docker-for-azure/
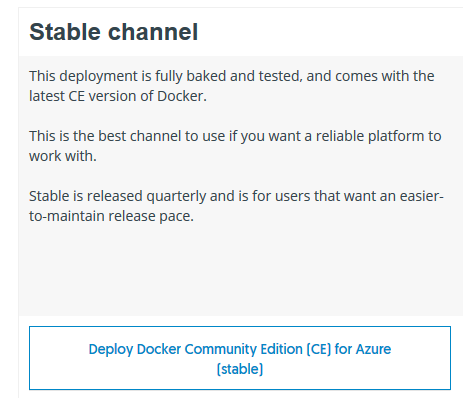
and click on “Deploy Docker Community Edition (CE) for Azure (stable)” and this will load a custom deployment on Azure.
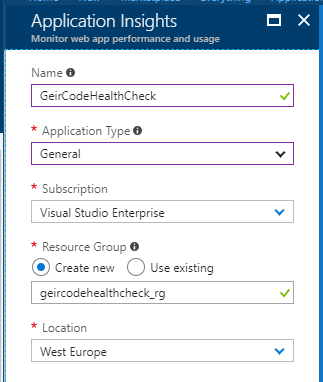
Let’s fill in the details:

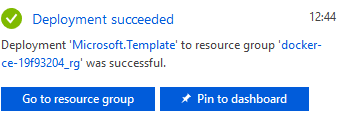
Click on “Purchase” and wait 3-4 minutes.
Update! If the Linux Worker Count is changed to only 1 VM, as done in this article, we will get the setup described in the rest of this article. However, if we specify 2 or more on “Linux Worker Count”, this setup will create a working Docker Swarm automatically. And wait a few more minutes for the workers to register automatically.

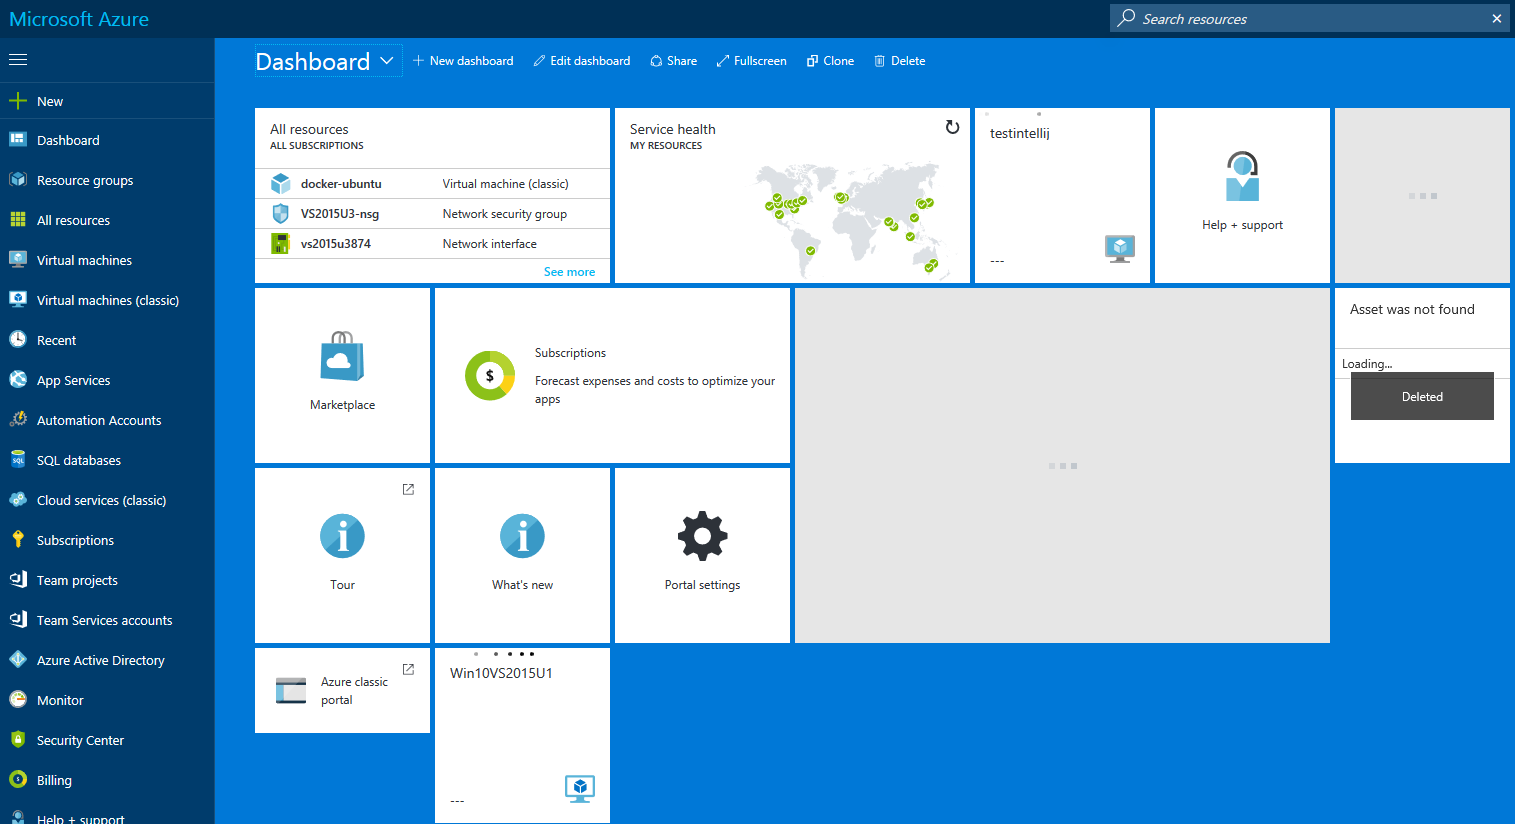
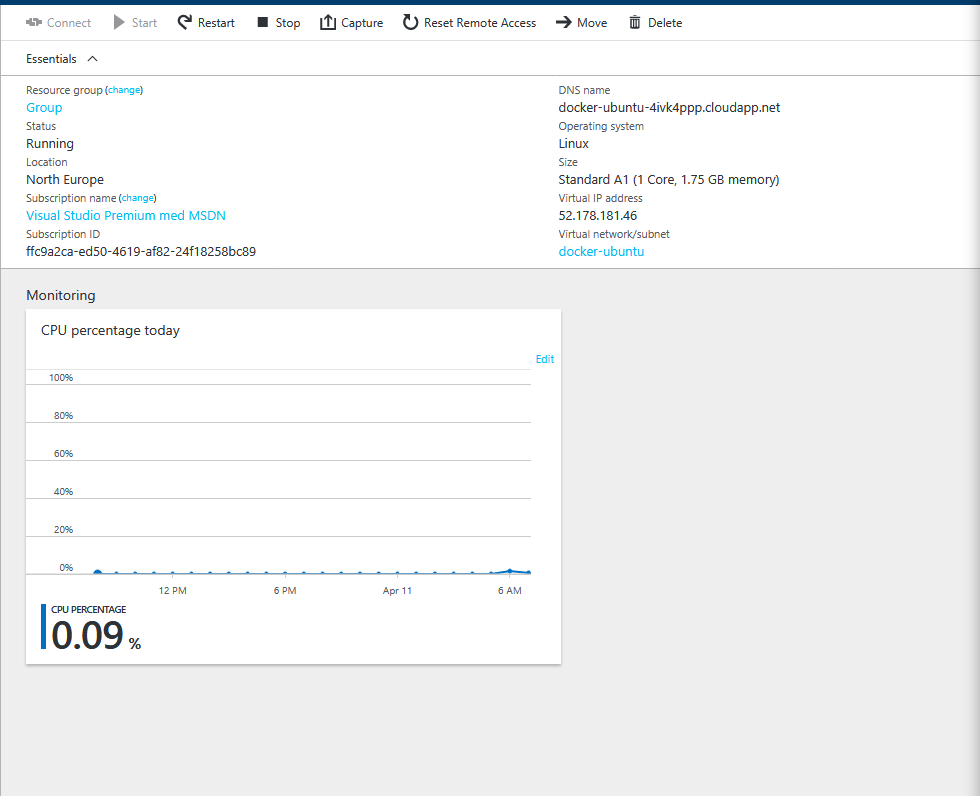
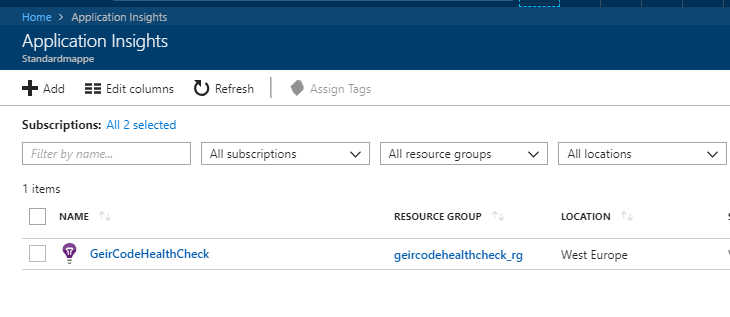
Listing the resources created:
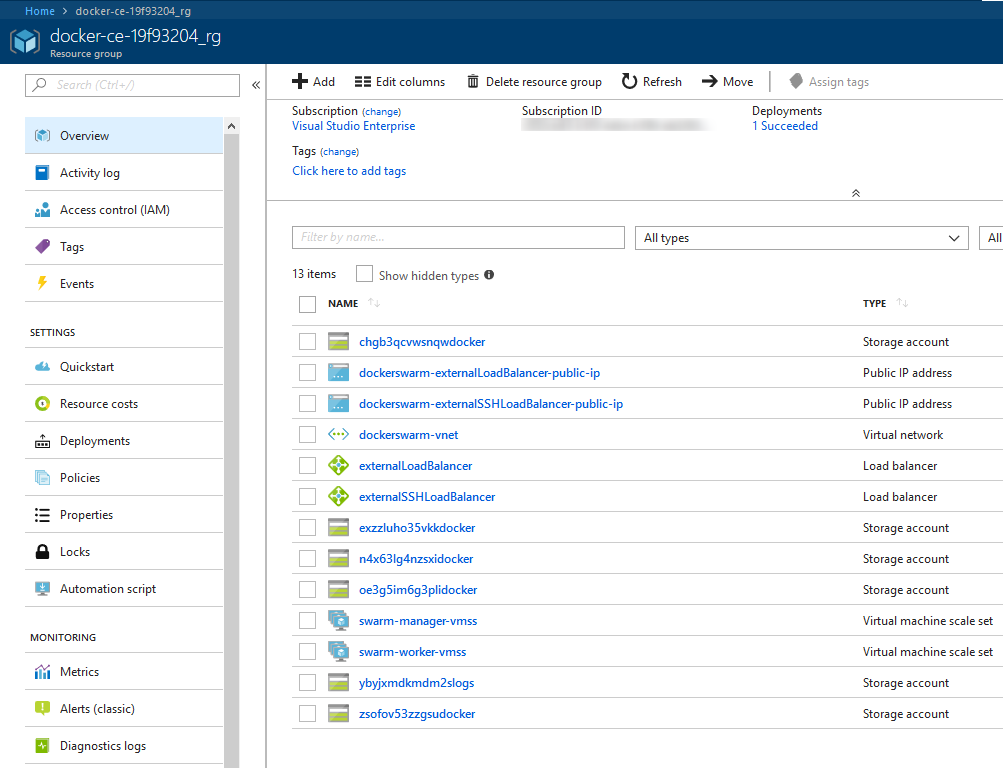
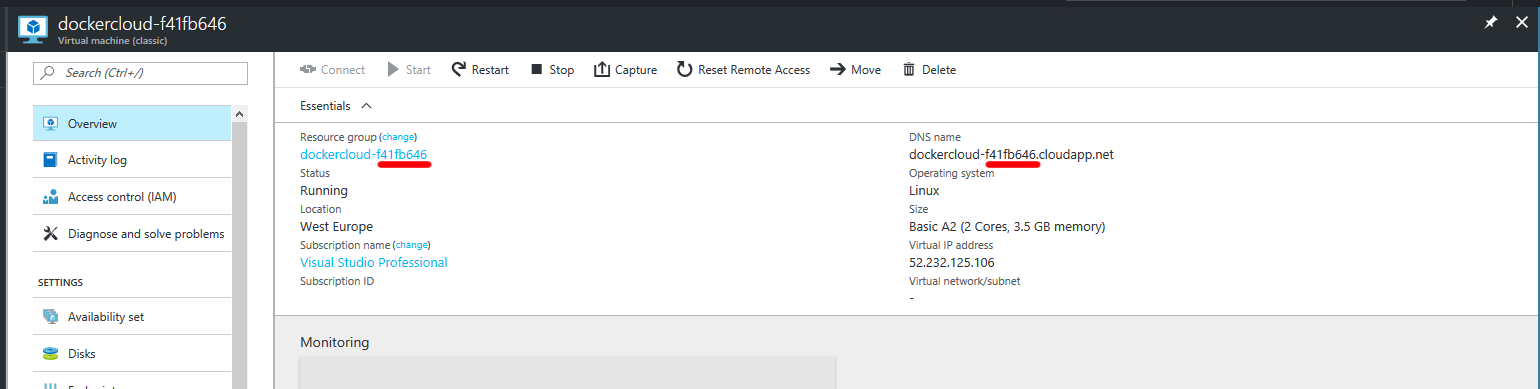
The new VM’s are hiding inside the Virtual machine scale sets “swarm-xxx-vmss”. In order to save VM costs during testing setups, you can Deallocate them from there.
Deploy your app on Docker for Azure
https://docs.docker.com/docker-for-azure/deploy/
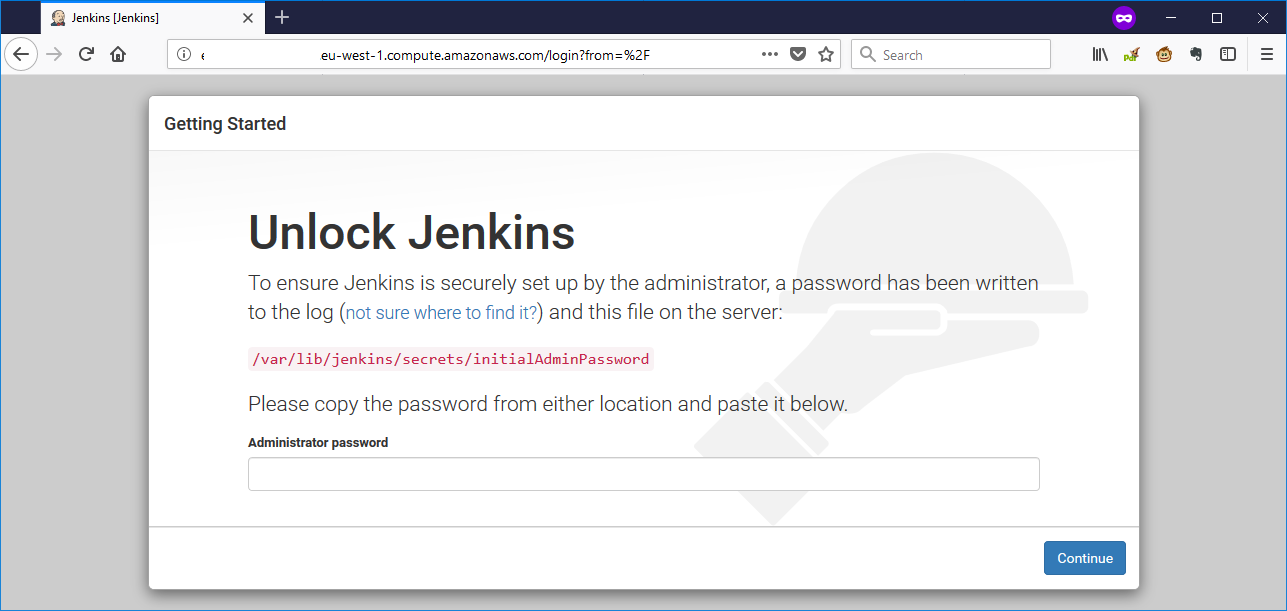
Navigate to “Outputs” on the deployment:
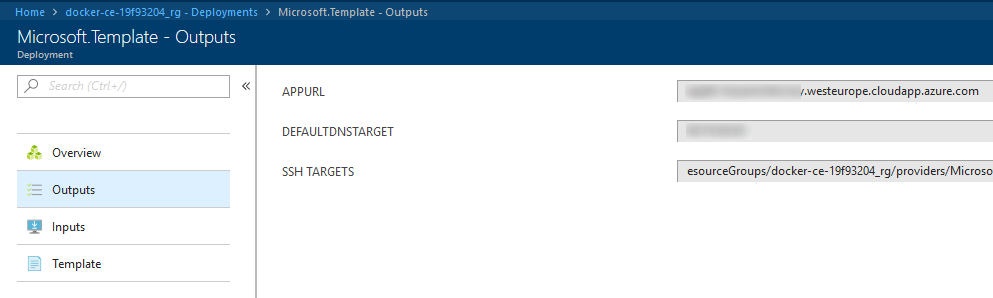
Copy the URL of “SSH TARGETS” to a browser to get this:

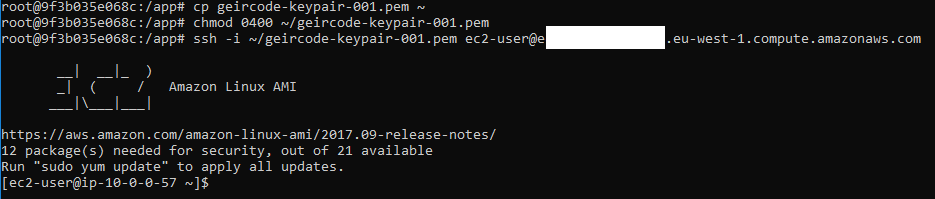
Time to login into the Swarm manager. I will use my Container to do this, but first I need to copy the Certificate from the volume shared directory “/app” to somewhere else outside this directory. This is because when a volume is shared to Docker Host, all files inside will get new file modes, and SSH demands a very specific file mode for the certificate.
Trying to connect to the Swarm manager:
root@40198a525e8f:/ubuntu# ssh -i /ubuntu/geircode_19f93204_rsa docker@40.74.57.141

ssh: connect to host 40.74.57.141 port 22: Connection refused
Ok, so that did not work. Aha, each swarm manager has different port i.e. port 50000.
root@40198a525e8f:/ubuntu# ssh -i /ubuntu/geircode_19f93204_rsa -p 50000 docker@40.74.57.141

The authenticity of host '[40.74.57.141]:50000 ([40.74.57.141]:50000)' can't be established.

RSA key fingerprint is ca:2b:5a:34:39:46:32:b5:f5:31:81:d9:68:ec:03:13.

Are you sure you want to continue connecting (yes/no)? yes

Warning: Permanently added '[40.74.57.141]:50000' (RSA) to the list of known hosts.

Enter passphrase for key '/ubuntu/geircode_19f93204_rsa':

Welcome to Docker!

swarm-manager000000:~$
Cool. I have now logged into my first Docker Swarm in Azure. Or so I thought.
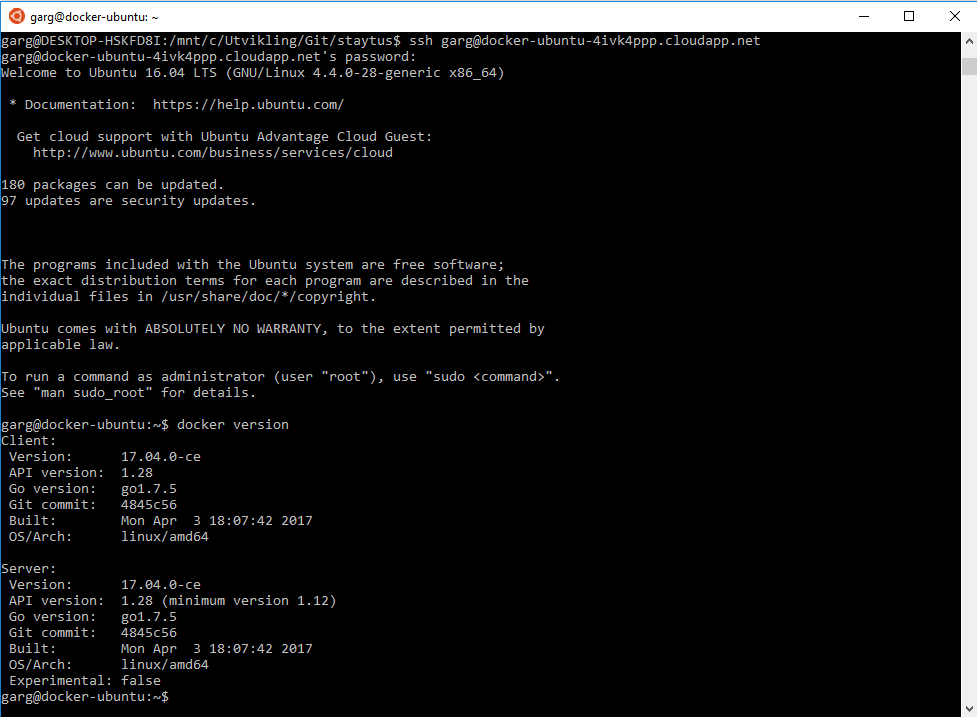
Run “docker info”
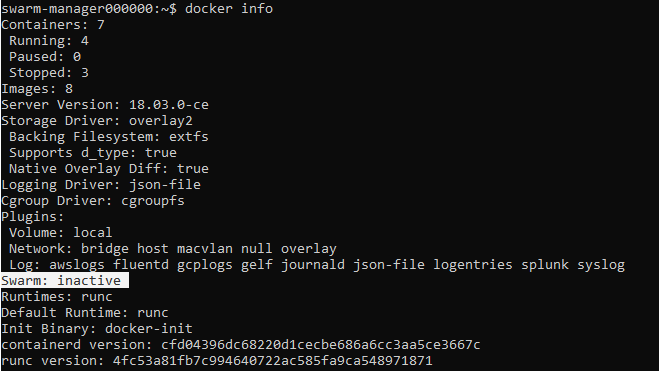
Why is “Swarm: inactive”?
Ok, apparently I need to add the Swarm workers manually via the Swarm manager through SSH. Why didn’t the Azure template just do this automatically? Oh well.
Connecting to your Linux worker nodes using SSH
I tried to configure SSH agent forwarding and got this error:
root@40198a525e8f:~$ ssh-add

Could not open a connection to your authentication agent.
According to https://stackoverflow.com/questions/17846529/could-not-open-a-connection-to-your-authentication-agent, I need to start the ssh-agent first!
root@40198a525e8f:/ubuntu# eval `ssh-agent -s`

Agent pid 96

root@40198a525e8f:/ubuntu# ssh-add -L

The agent has no identities.

root@40198a525e8f:/ubuntu# ssh-add /ubuntu/geircode_19f93204_rsa

Enter passphrase for /ubuntu/geircode_19f93204_rsa:

Identity added: /ubuntu/geircode_19f93204_rsa (/ubuntu/geircode_19f93204_rsa)

root@40198a525e8f:/ubuntu#

root@40198a525e8f:/ubuntu# ssh -p 50000 -A docker@40.74.57.141

Welcome to Docker!

swarm-manager000000:~$
Yay. My SSH agent is working.
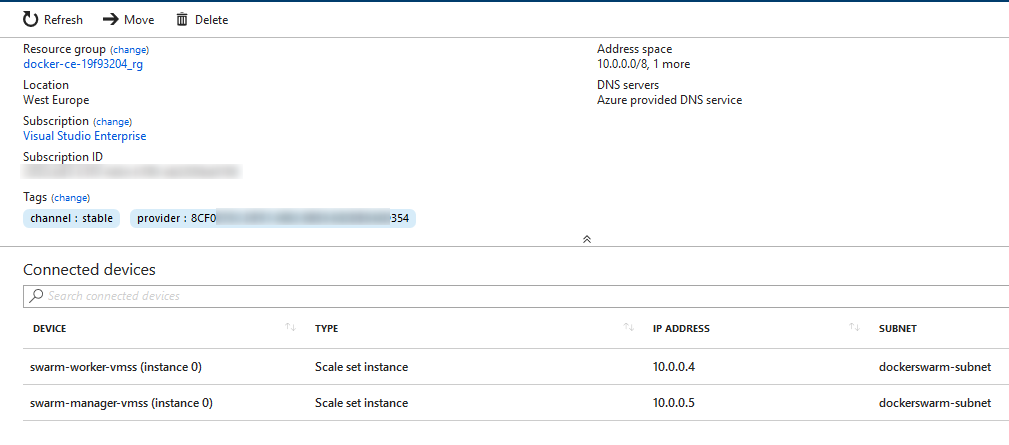
So where do I find my Swarm workers IP?
Go to the resource list and find the vnet setup: i.e. “dockerswarm-vnet”.
swarm-manager000000:~$ ssh -A docker@10.0.0.4

The authenticity of host '10.0.0.4 (10.0.0.4)' can't be established.

RSA key fingerprint is SHA256:c260W6he0ppCfmik+oa7TN42K4/xfPigAK2VysCSe6U.

Are you sure you want to continue connecting (yes/no)? yes

Warning: Permanently added '10.0.0.4' (RSA) to the list of known hosts.

Welcome to Docker!

swarm-worker000000:~$
Join the worker to the Docker Swarm:
swarm-worker000000:~$ docker swarm join --token SWMTKN-1-591r0uu76vnar02h8f16n1e2p5p0dbt2pzpm4g89o0zrymhn39-a9q5n6bv4svr3amjscmvp2x55 10.0.0.5:2377

This node joined a swarm as a worker.

swarm-worker000000:~$ exit

Connection to 10.0.0.4 closed.

swarm-manager000000:~$ docker node ls

ID HOSTNAME STATUS AVAILABILITY MANAGER STATUS ENGINE VERSION

py4y0q2jmk8jgi806nc0jofgc * swarm-manager000000 Ready Active Leader 18.03.0-ce

1qv3m227fz9n9mz3fg0trwhxt swarm-worker000000 Ready Active 18.03.0-ce

swarm-manager000000:~$
Whohoo!
To test my swarm I will use https://github.com/dockersamples/example-voting-app.
Login Swarm Manager node and run:
git clone https://github.com/dockersamples/example-voting-app.git
cd example-voting-app/
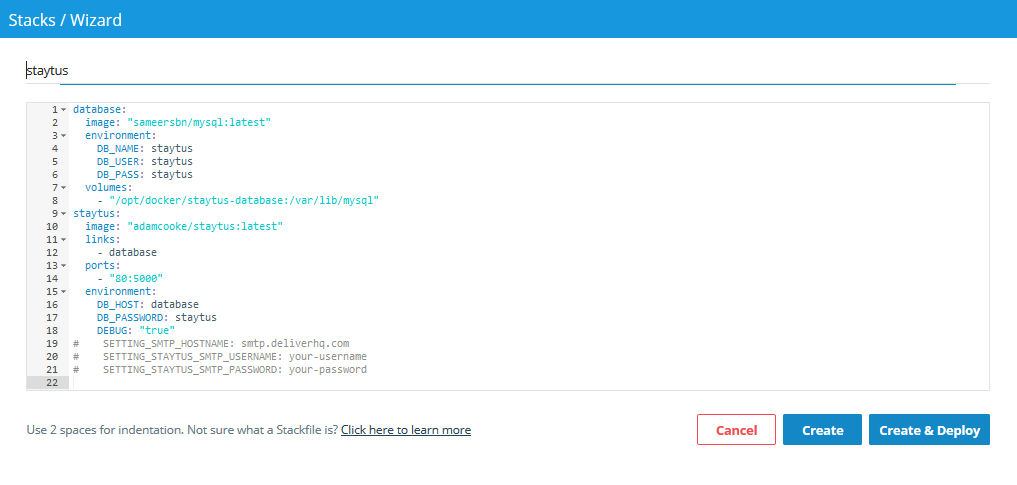
docker stack deploy --compose-file docker-stack.yml vote
But first I need to scale up my workers by increasing here:
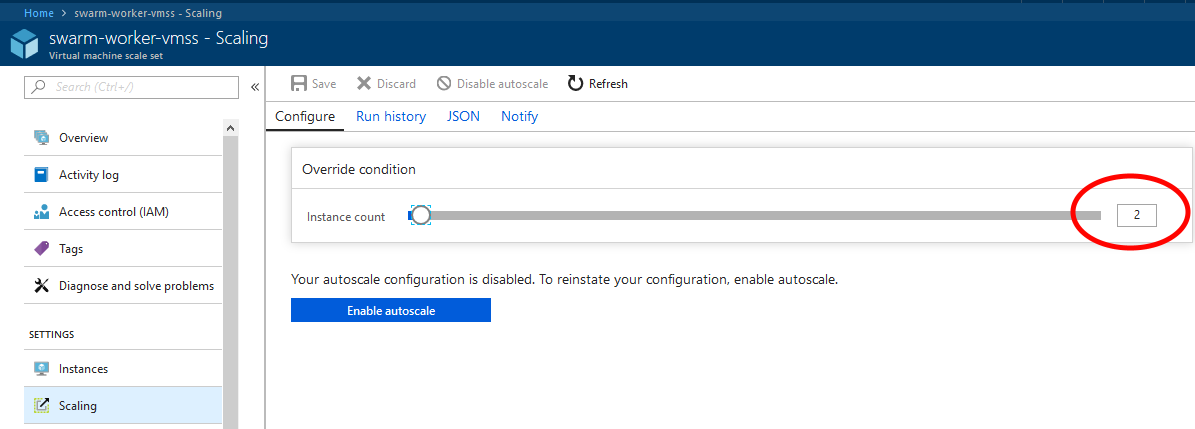
And joining the Worker to the Manager like before. Now I have this:

NB: At this point I ran in several quirks:
- First, at the moment the Manager also works as a Node. So if you try to create a Docker service, it will start up on the Manager Node and not be available on the LoadBalancer URL that is only connected to the Worker Nodes.
- All network traffic to the Worker Nodes are blocked by default. You have to create a Rule for every Port that is going to be open for the internet.
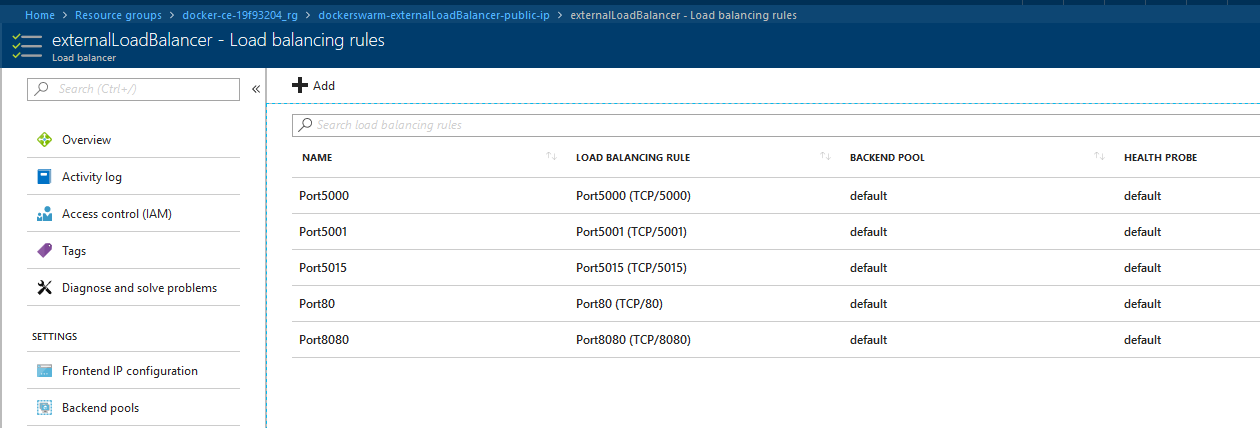
Add a rule for each port that is going to be reachable from the internet.
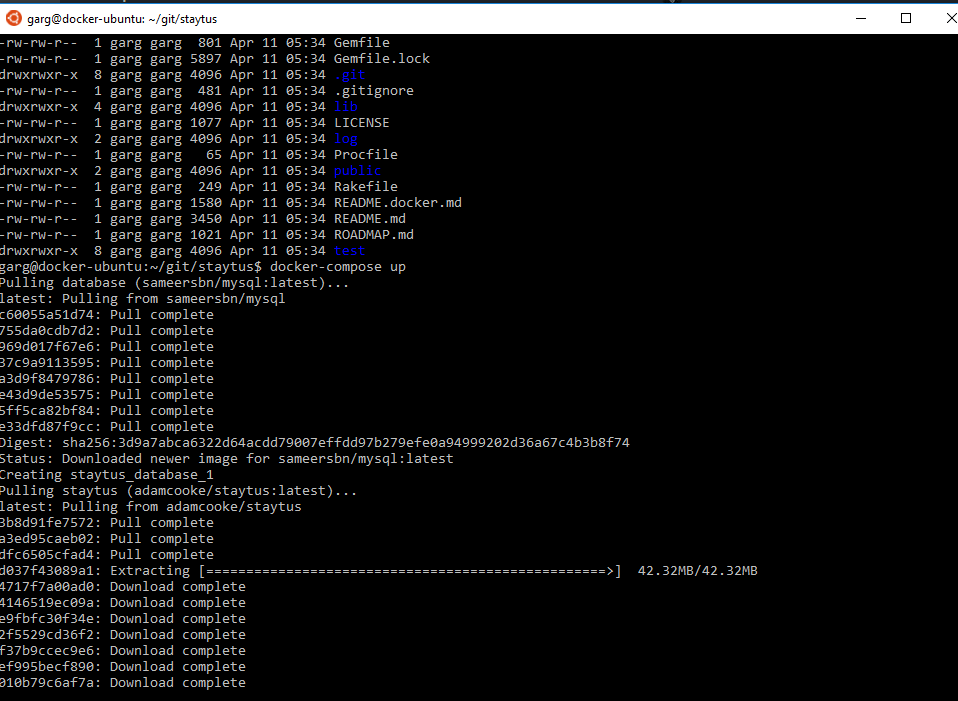
Deploy the app:
swarm-manager000000:~/example-voting-app$ docker stack deploy --compose-file docker-stack.yml vote

Creating network vote_backend

Creating network vote_frontend

Creating network vote_default

Creating service vote_result

Creating service vote_worker

Creating service vote_visualizer

Creating service vote_redis

Creating service vote_db

Creating service vote_vote

swarm-manager000000:~/example-voting-app$
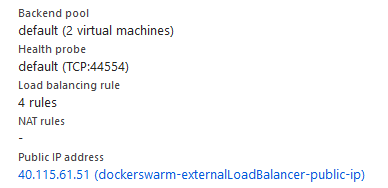
Find the URL for the public Loadbalancer for the Worker nodes. In my case it was “dockerswarm-externalLoadBalancer-public-ip”:
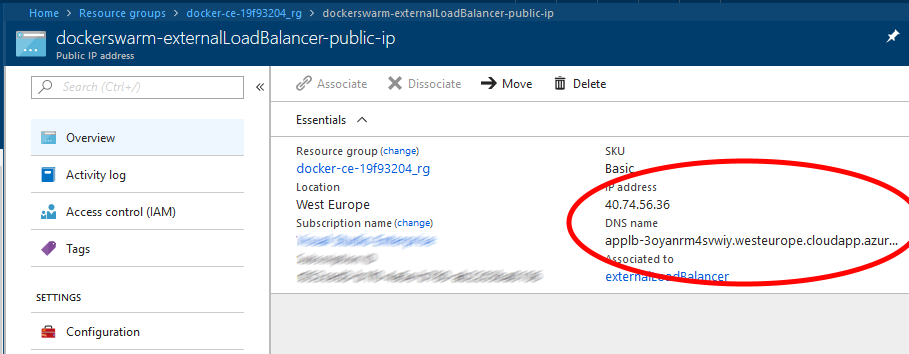
Open the URL in a browser with the correct Port:
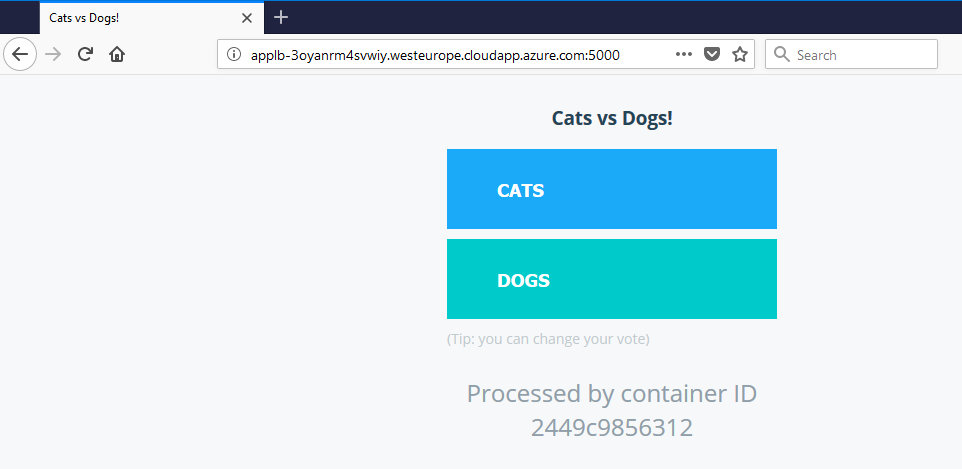
Yes!
Conclusion: Setting up Docker Swarm in Azure this way had way too many unnecessary steps than I first thought. This should have rather been done in a declarative way such as i.e.: “I want 1 Manager, 2 Workers. Give it to me please, and connect the swarm to my local Docker CLI”.
!Conclusion update: If we specify 2 or more on “Linux Worker Count” when configuring the Azure template, this setup will create a working Docker Swarm automatically.
Article is also available here => https://geircode.atlassian.net/wiki/spaces/geircode/pages/185827331/Setting+up+Docker+Community+Edition+on+Azure
https://hub.docker.com/r/geircode/docker_ce_19f93204/


 ’
’