Following the shutdown of Docker Cloud, I needed to move my stuff elsewhere. There are a lot of alternatives and one of them is Amazon ECS.
Goal:
- Run my Container Image on ECS with Jenkins
I will be following the guide AWS CICD_Jenkins_Pipeline.
Considering that the Docker Cloud setup and integration with Github and AWS was a breeze (could be done completely by GUI), how does this setup with Amazon AWS ECS compare?
After creating a new fresh account in AWS and reviewing all the “prerequisites” I see that it’s going to use AWS CLI a lot, so why not do all this configuration from a container.
https://bitbucket.org/geircode/awsjenkins
With this Container setup I mount my local folder directly into the Container so that any changes locally are also done inside the container. This mean that I edit the shell script in Visual Studio Code but run it in the Container. Very handy, because I don’t need to install anything on my Windows Host in order to run bash/shell scripts and this will work on any computer.
Step 1: Build an ECS Cluster
Nub alert, I am failing already on the first step:
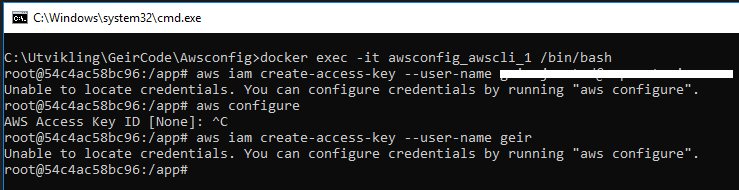
Apparently, I need a IAM user with some rights.
>> “<user_name> is an IAM user with Adminstrator Access.”
How to do this?
Adding user: https://console.aws.amazon.com/iam/home?region=eu-west-1#/home
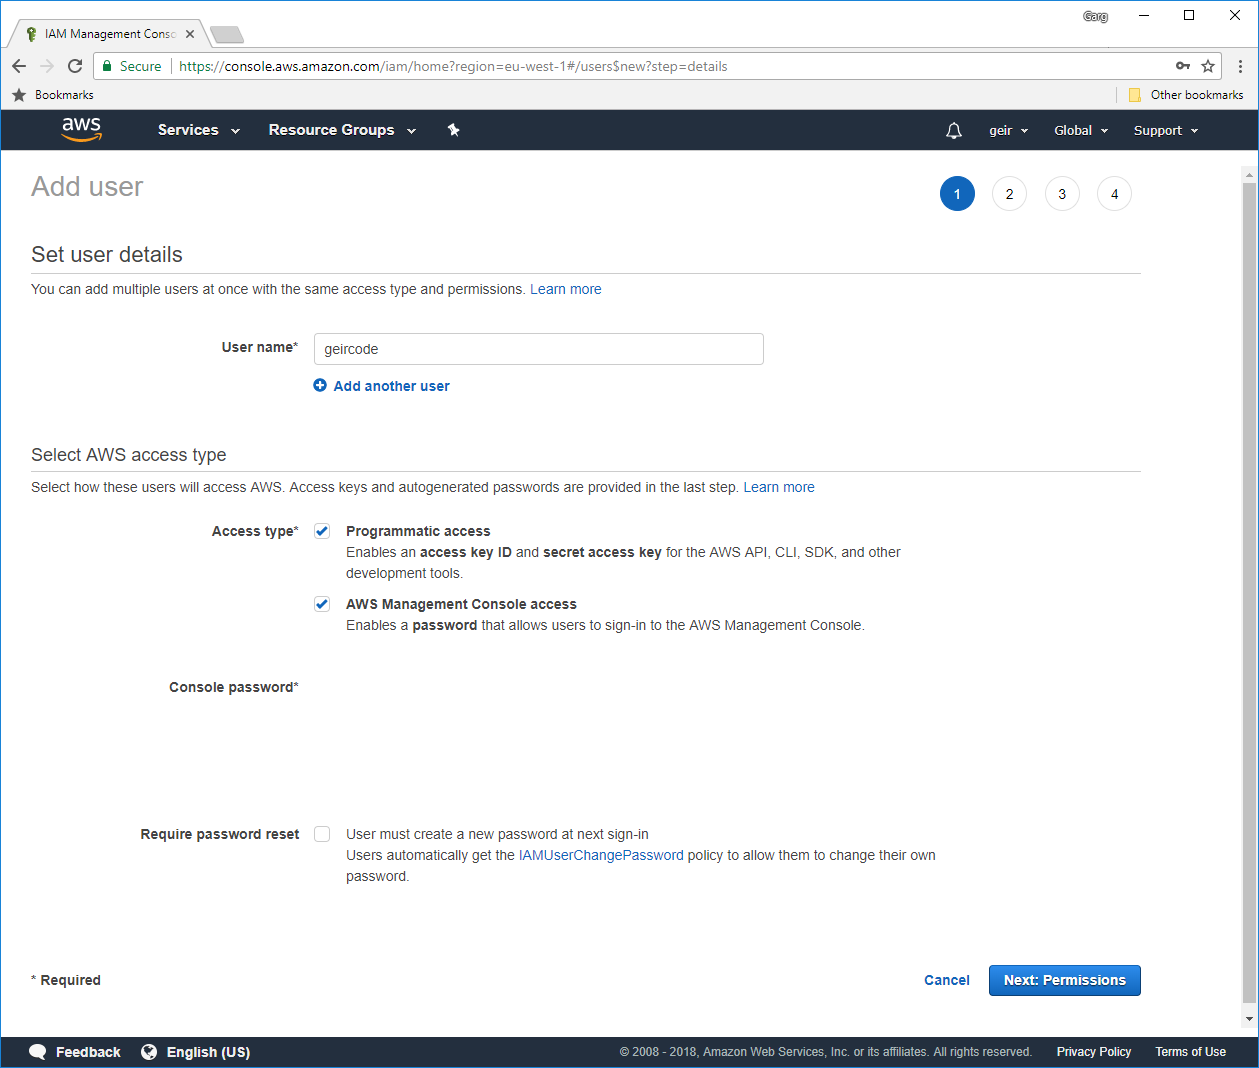
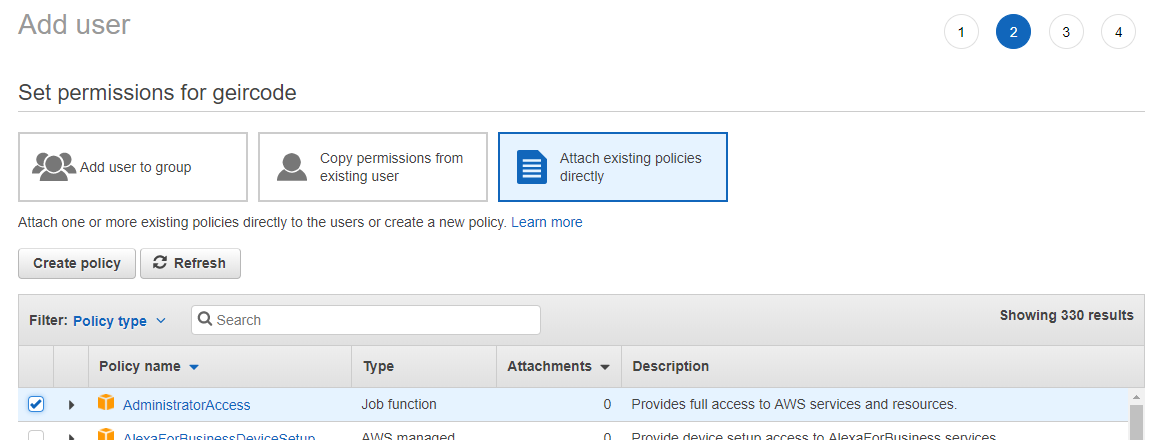
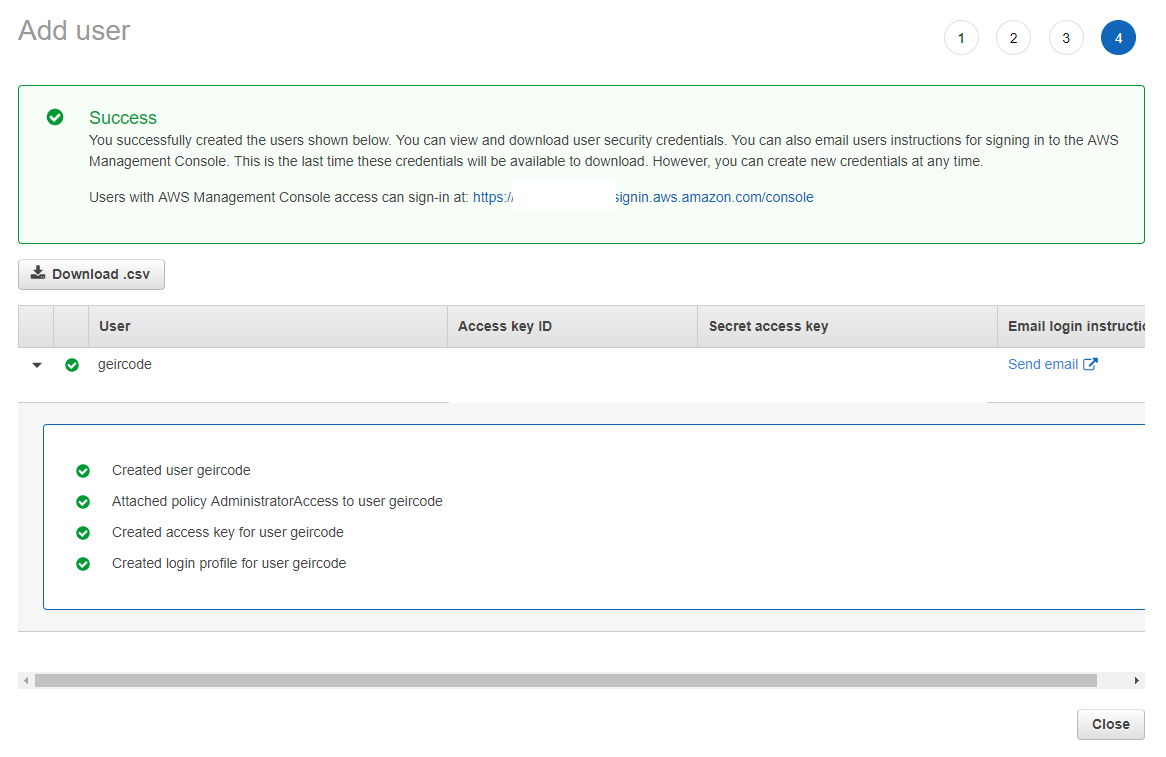
Ok. That was easy.


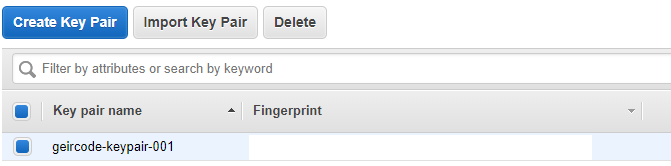
>> “Create an SSH key in the us-west-2 region. You will use this SSH key to log in to the Jenkins server to retrieve the administrator password.”
https://eu-west-1.console.aws.amazon.com/ec2/v2/home?region=eu-west-1#KeyPairs:sort=keyName (for some reason you have manually copy-paste this URL to your browser:)
>> Clone the GitHub repository that contains the AWS CloudFormation templates to create the infrastructure you will use to build your pipeline.


https://eu-west-1.console.aws.amazon.com/cloudformation/home?region=eu-west-1#/stacks?filter=active

https://eu-west-1.console.aws.amazon.com/ec2/v2/home?region=eu-west-1#Instances

Some EC2 instances starting up.
>> Step 2: Create a Jenkins Server

>> Retrieve the public host name of the Jenkins server. Open a terminal window and type the following command:

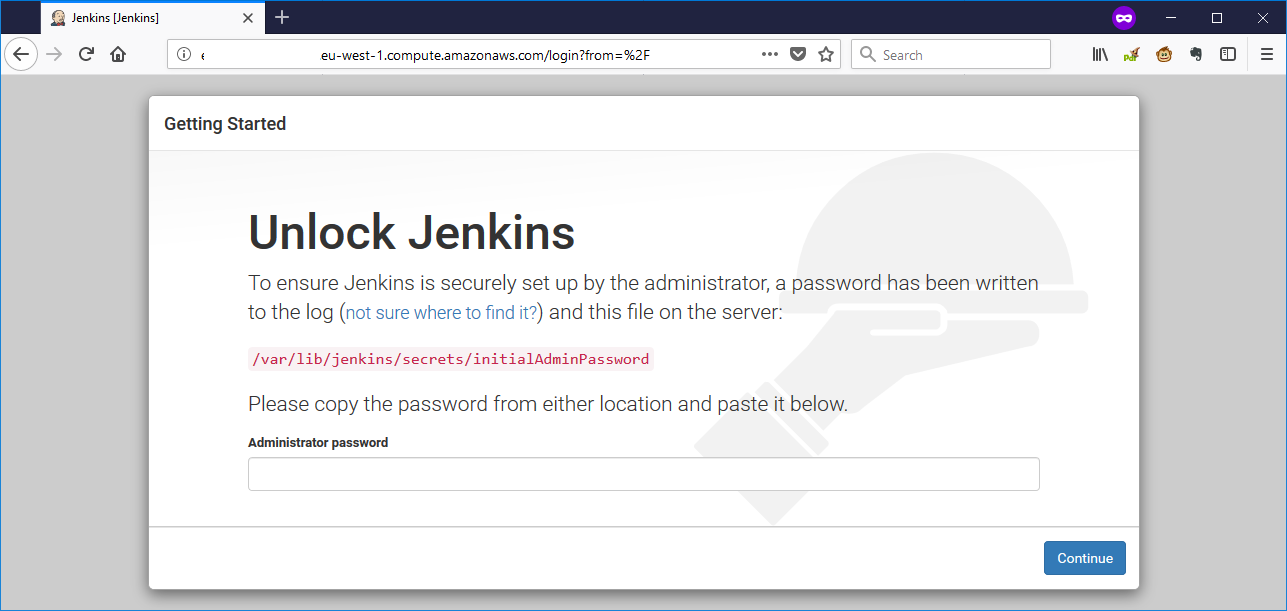
>> SSH into the instance, and then copy the temp password from /var/lib/jenkins/secrets/initialAdminPassword.
Here I encountered this error:

Fix this by changing the mode of file to exactly “0400”, but it appeared that I can’t change a mounted file to 0400, so I had to copy the file to a different directory directly and change it there
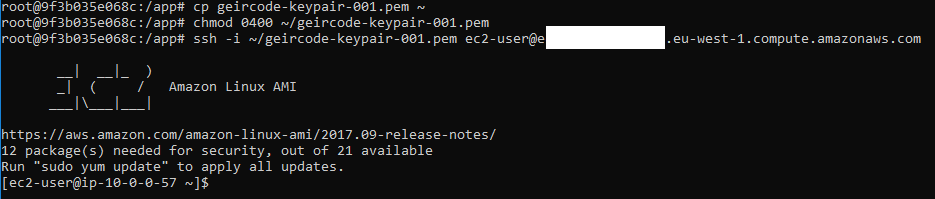
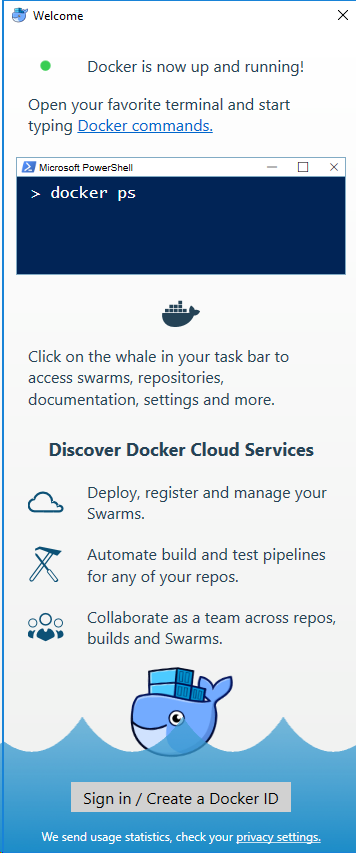
Cool. So, what does this instance have already installed. Checking “docker”

Hurray, it got Docker.
>> sudo cat /var/lib/jenkins/secrets/initialAdminPassword
Ok, I got the password.
>> Step 3: Create an ECR Registry
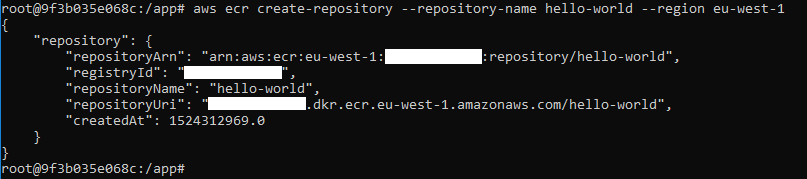
>> Verify that you can log in to the repository you created (optional).
How to do this from a Container?
First add “/var/run/docker.sock:/var/run/docker.sock” to docker-compose and set “COMPOSE_CONVERT_WINDOWS_PATHS=1” in a .env file that docker-compose then reads.
Refs https://forums.docker.com/t/how-can-i-run-docker-command-inside-a-docker-container/337/9
And https://stackoverflow.com/questions/49507912/docker-jwilder-nginx-proxy-container-create-issue
Then install the Docker Cli inside the Container:
curl -fsSLO https://get.docker.com/builds/Linux/x86_64/docker-17.03.1-ce.tgz && tar –strip-components=1 -xvzf docker-17.03.1-ce.tgz -C /usr/local/bin
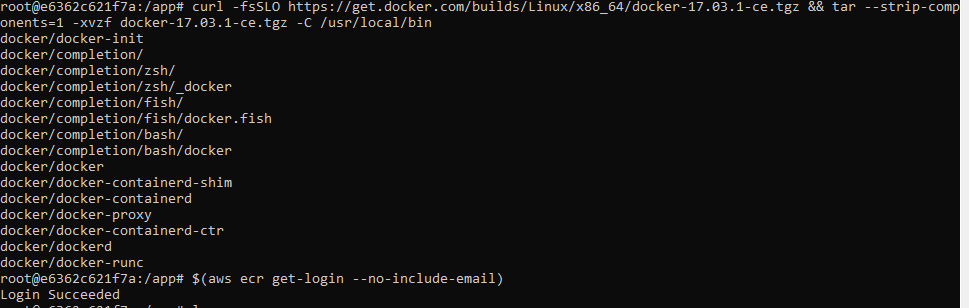
Login Succeeded! Nice.
>> Step 4: Configure Jenkins First Run
Navigating to my jenkins:
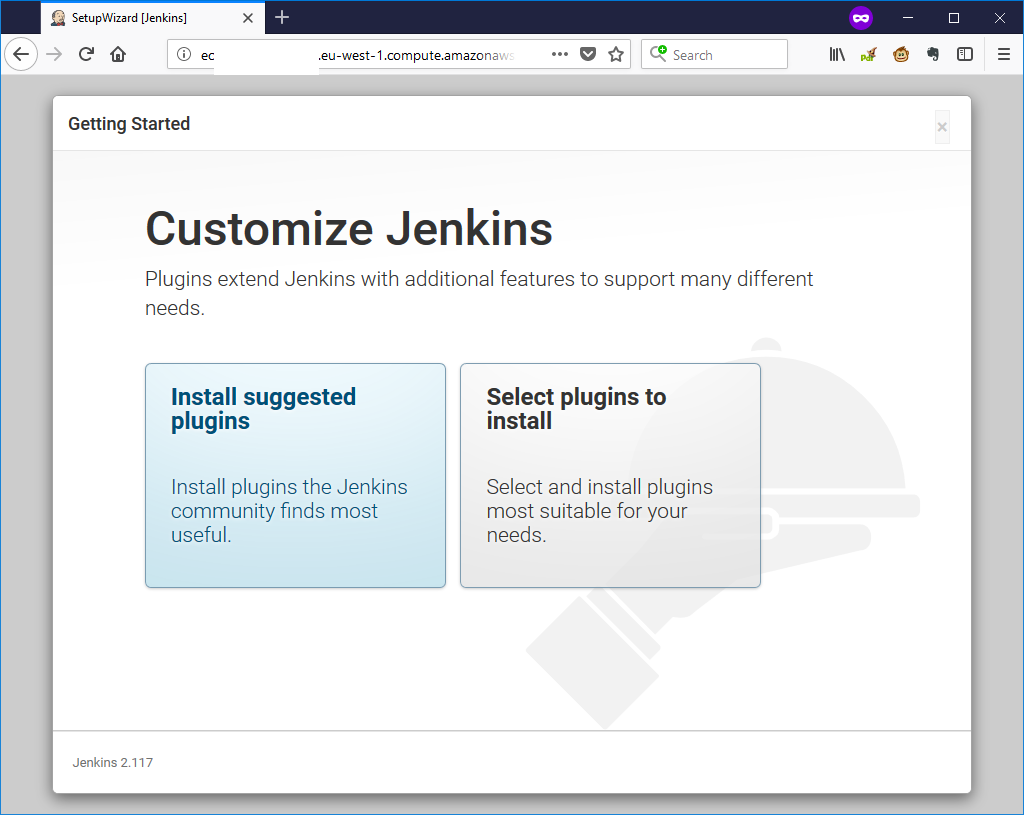
While following the instructions I had some problems with the Jenkins complaining about missing dependencies, but the solution was to:

Click on the downgrade to 1.9 and “Restart Jenkins when installation is complete and no jobs are running”, and then install “Amazon ECR”.
>> Step 5: Create and Import SSH Keys for GitHub
>> Step 6: Create a GitHub Repository
Done that a few times before. https://github.com/geircode/jenkinsdemo
>> Enable webhooks on your repository so Jenkins is notified when files are pushed.
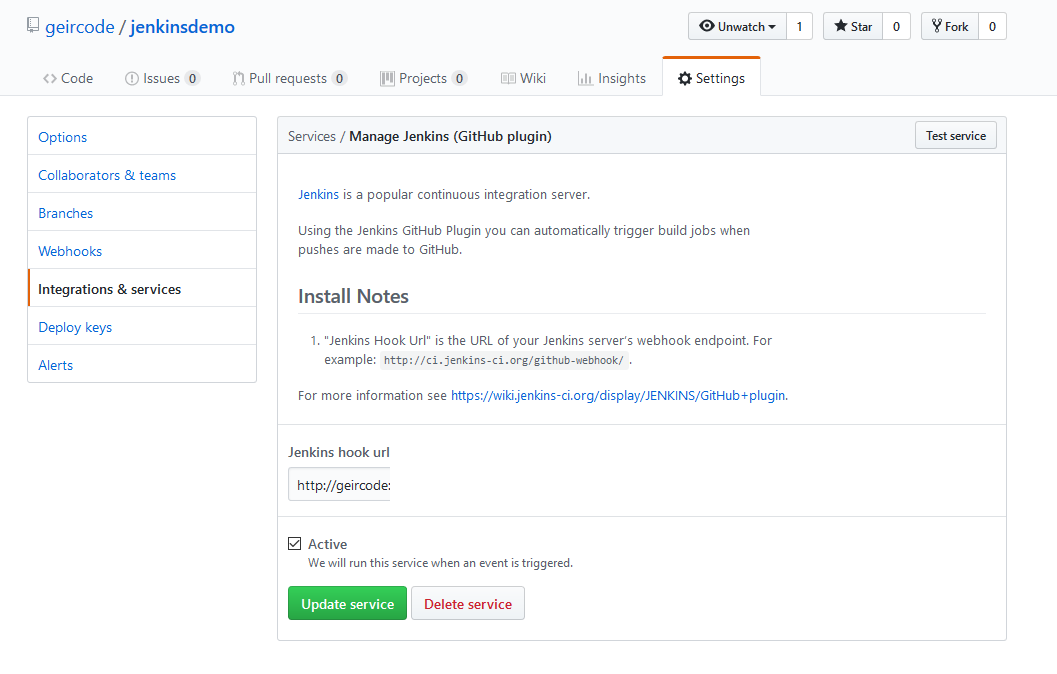
Hmm, do I need to do this manually on every repository? That’s not very automation friendly. And if the jenkins URL changes then I need to manually update all the repositories with the new URL? That’s not going to scale very good. Plus, the password is written directly into the URL. There must be and probably is a better way to do this.
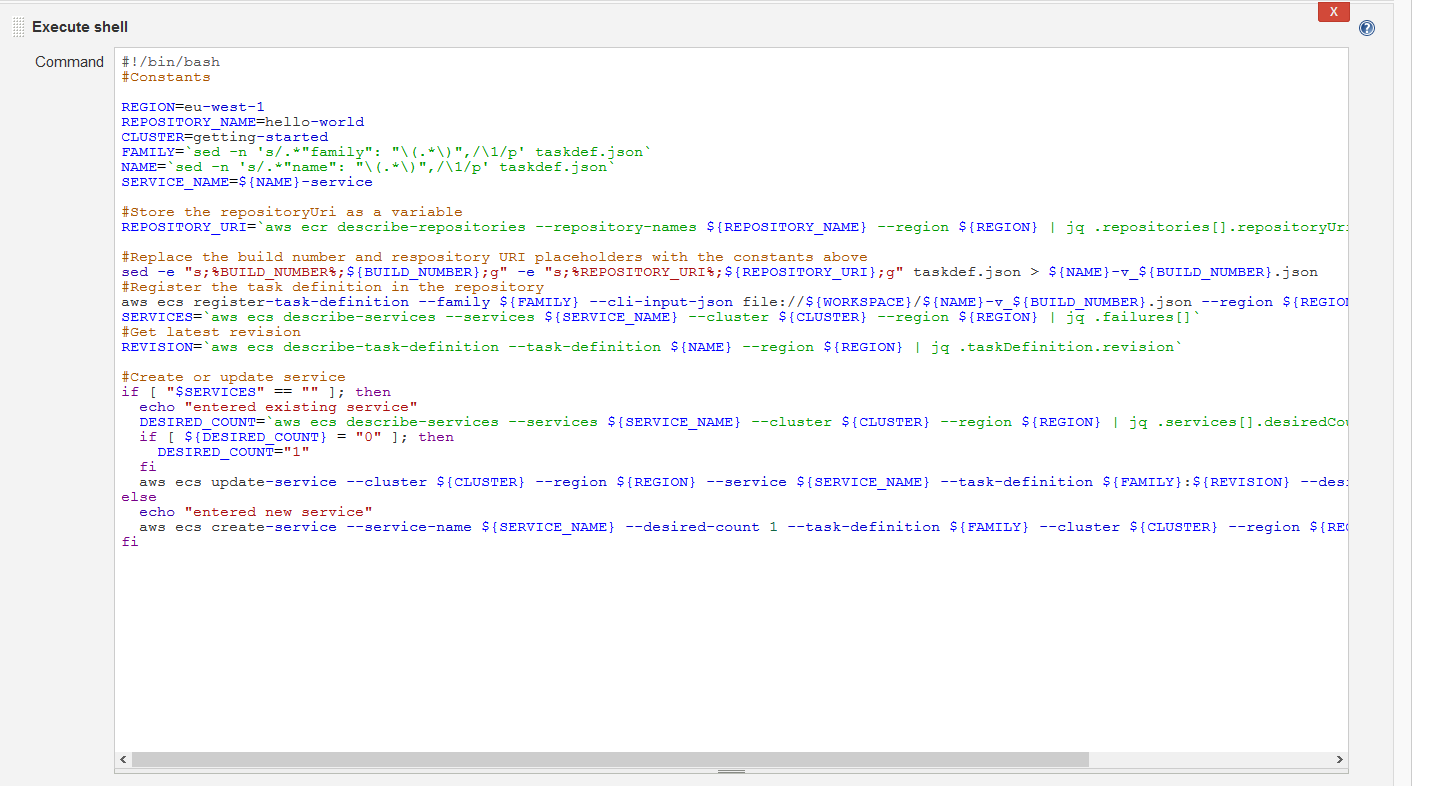
>> Step 7: Configure Jenkins
After some time I got this configuration to work.
I was unable to complete step 7.1.f “Under build triggers, choose Build when a change is pushed to GitHub”, because the option was not there. Because of this, the integration to GitHub doesn’t work with the webhook.

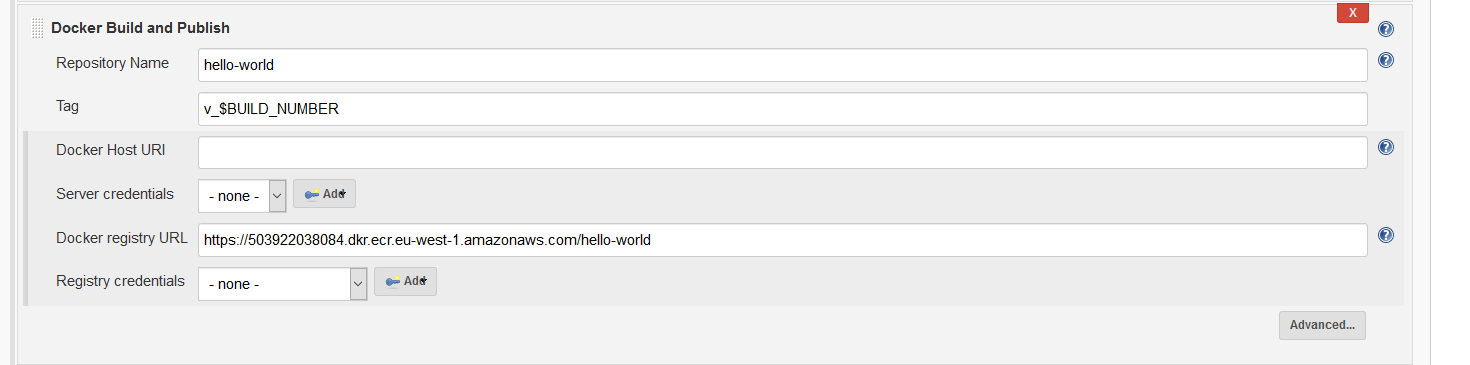
Very important to have https:// here.
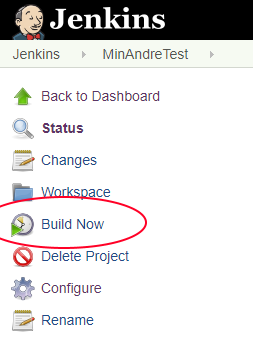
After setting it up, you can test the project by clicking on the “Build Now” button.
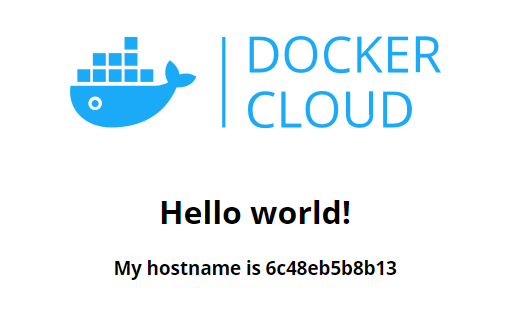
>> Under Network bindings, choose the IP address in the External Link column.
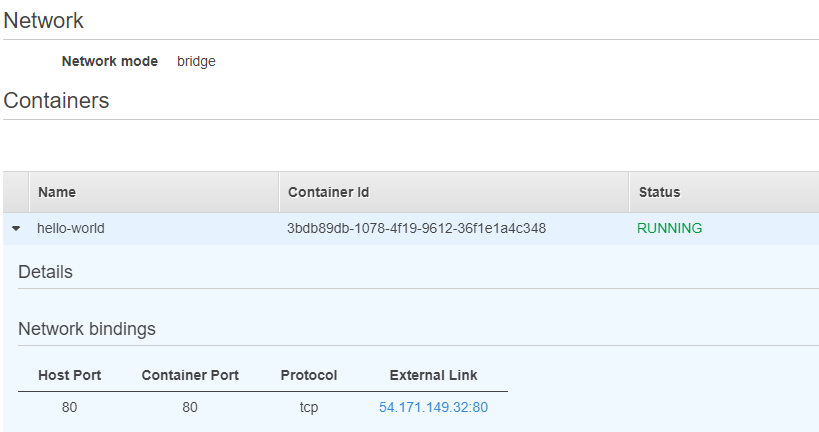
And Voila:
Conclusion:
By following the guide, I was able to create a running Container using ECS, but I was not able to get the integration between GitHub and Jenkins to work properly because of missing options in Jenkins. Also, when I changed the source code of my Github repository and built a new Container, the new Container did not get the latest changes for some strange reason.
In addition to this, the webhook integration seems to be deprecated:
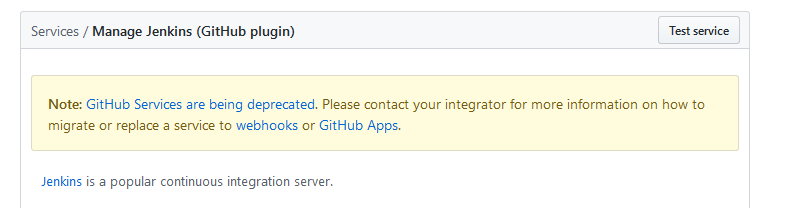
Anyways, I learnt a lot about setting up and managing Jenkins and ECS/ECR.